The Ultimate Home Espresso Setup

This blog typically focuses on accessible and cost effective ways to make coffee, but just because you drive a regular car doesn’t mean you can’t check out some exotic sports cars once in a while. If you’re the type of person who has no budget and cares about style and having the best, then this blog is for you.

Below are some of the most over the top machines to make espresso at home. These machines are miniaturized versions of commercial machines that you can find in your favorite cafes. We also talk about some high end grinders to pair with these machines. All these machines will be total overkill for a home setup and are all very capable machines. For many of you, what it will come down to is what style and features you want for your setup. Unless noted below these machines can be operated without direct plumbing for easy countertop use. All espresso machines require regular care and maintenance and also perform better when used with filtered/softened water. Some may even require professional installation and filtered/softened water for warranty purposes so don’t overlook that.


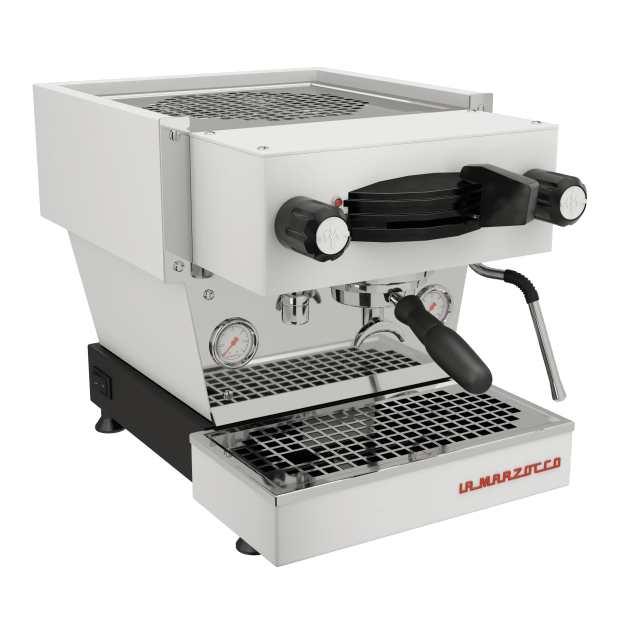
The most common “end game” machine you’ll see in the home specialty space is the La Marzocco Linea Mini (LMLM). It only comes with a Manual Paddle (MP) operation and is an absolute beast when it comes to pulling shots and steaming milk. This machine has a lot of aftermarket options and even has companies dedicated to their customization with aftermarket colors and accessories. 


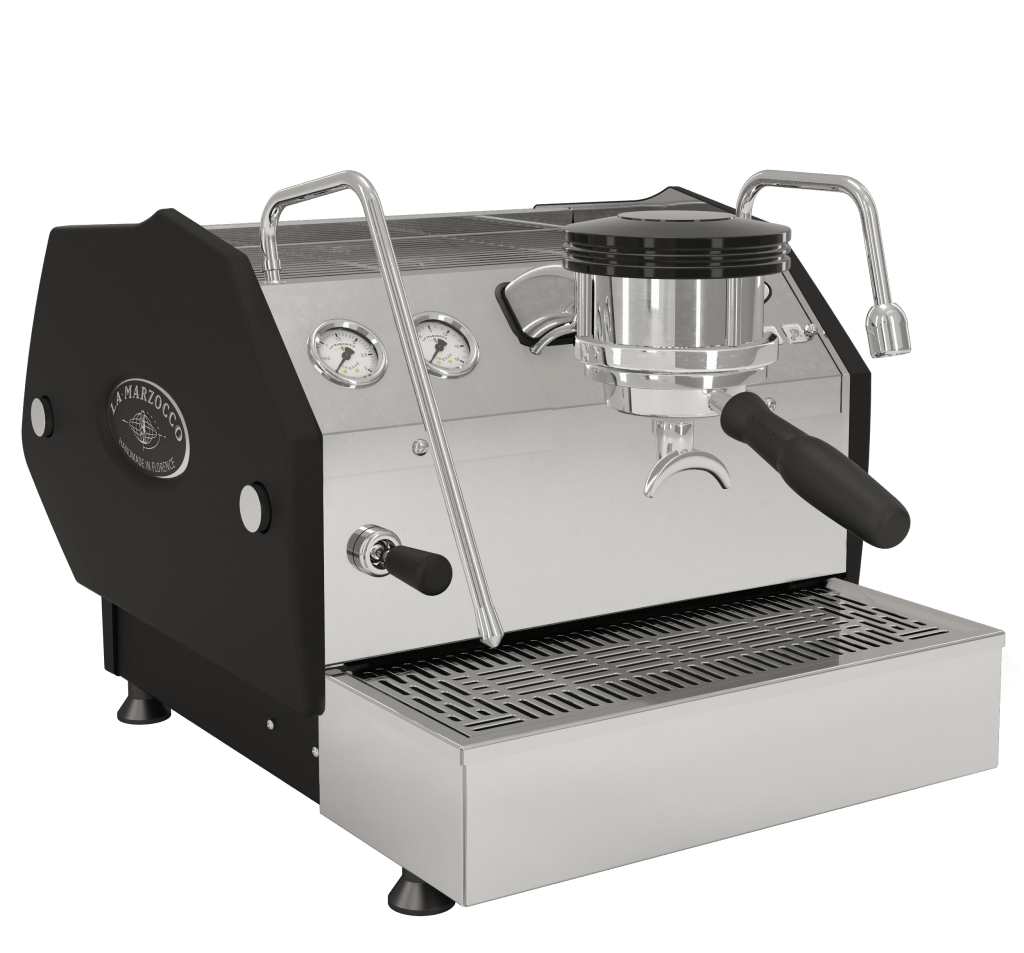
Those who want to take it up another notch will go for the La Marzocco GS3, offered in both Manual Paddle (MP) and Auto-Volumetric (AV) models. If you’re in the market for one of these, you probably already know the difference and your preference, but the AV model allows you to program the volume of water for easy repeatability in pulling your shots. For example, if your partner doesn’t want to be bothered with weighing espresso output, it would be easier for a less experienced home barista to pull a shot on an AV machine.


If you’re a technology lover and like this design check out the Victoria Arduino Eagle One Prima. This machine has a myriad of settings that can be controlled through the app and is designed with sustainability in mind in an effort to reduce water and electric usage. This machine offers auto-volumetric capabilities for easy to repeat shots.


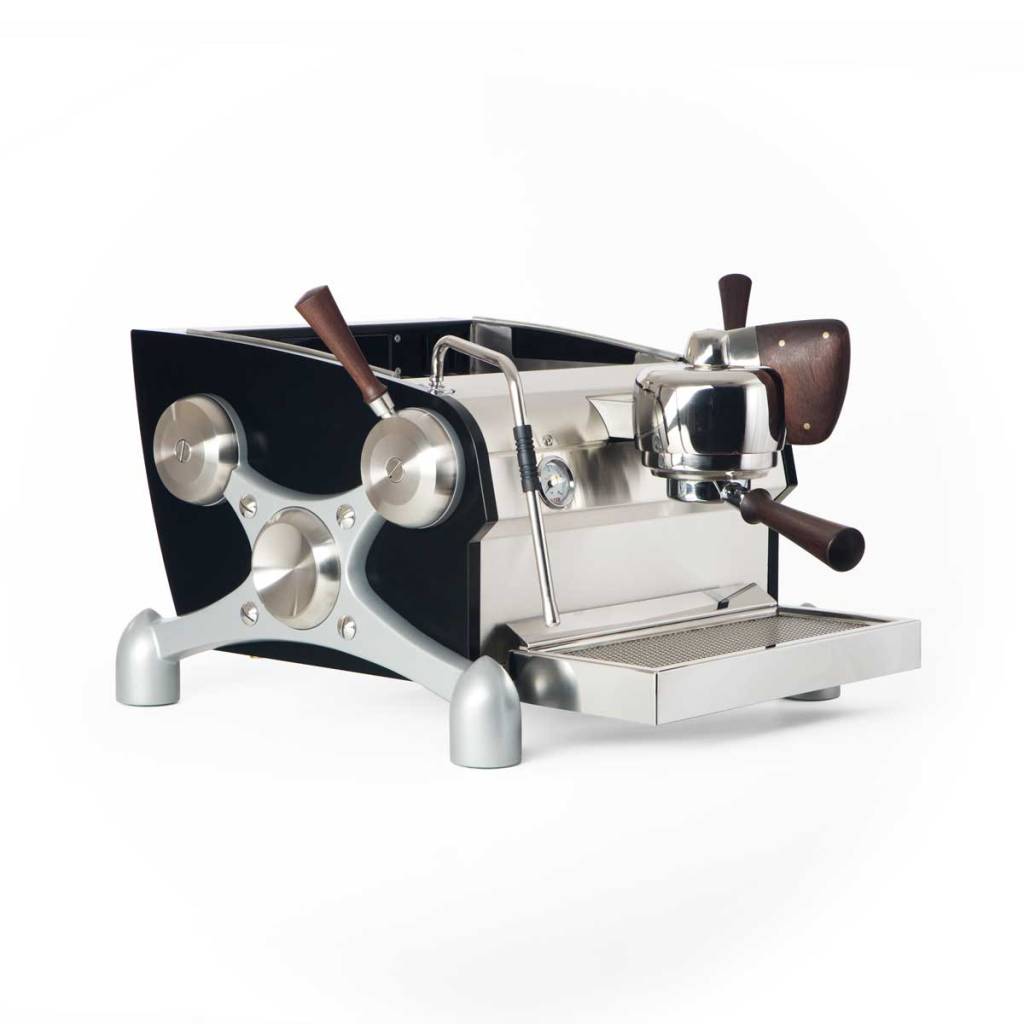
The Slayer Single Group is the most expensive machine we list and really leans toward commercial use as this machine requires plumbing to be operated. This means you’ll need to have someone cut a hole in your countertop for the cleanest looking install. This machine only has a manual paddle for operation. You’ll see this same machine in multiple group head configuration in the most trendy specialty coffee shops.


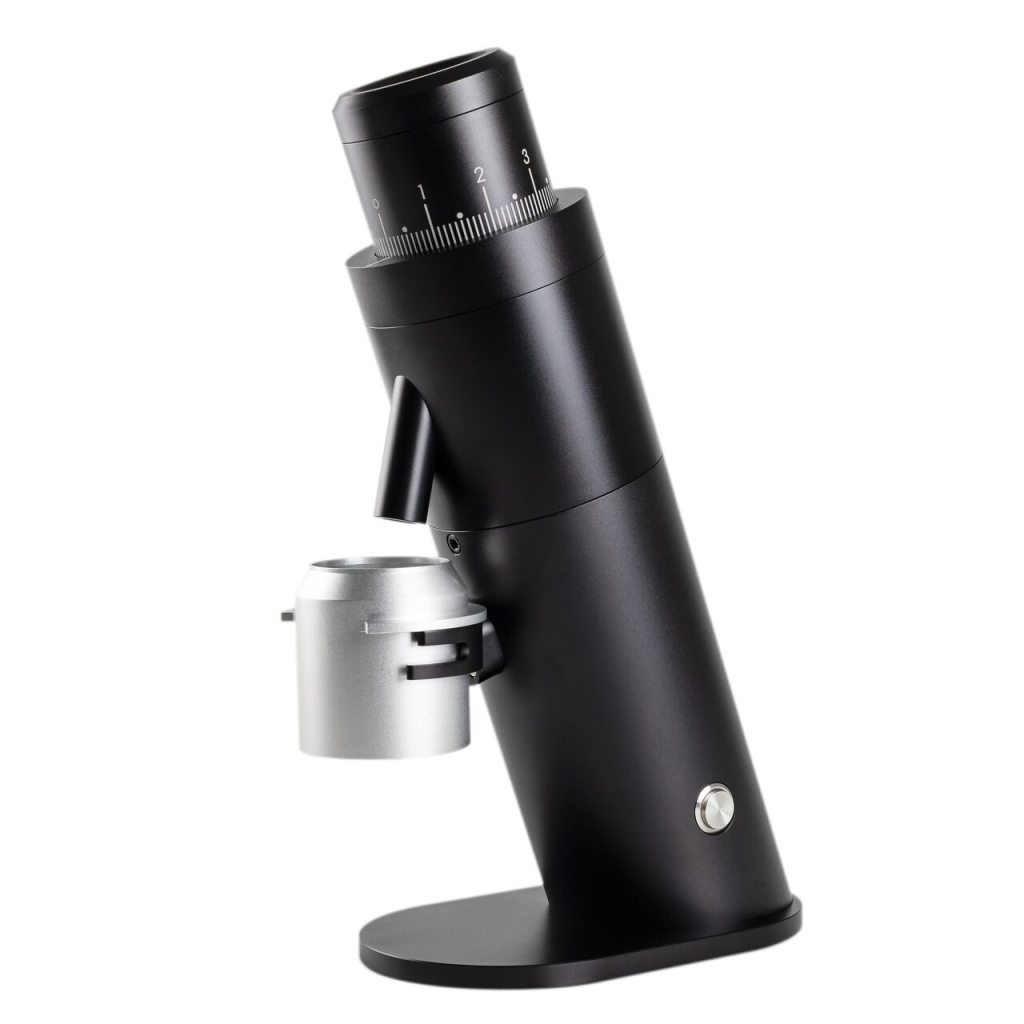
The Option-O Lagom P64 is one of the best single dosing grinders money can buy and will pair nicely with any of the above machines. 


The Mahlkonig E65S GbW is a commercial grinder that has the feature to Grind by Weight. If you’re pulling consecutive shots the speed offered may be of interest to you. Otherwise I’d stick with a single dose grinder


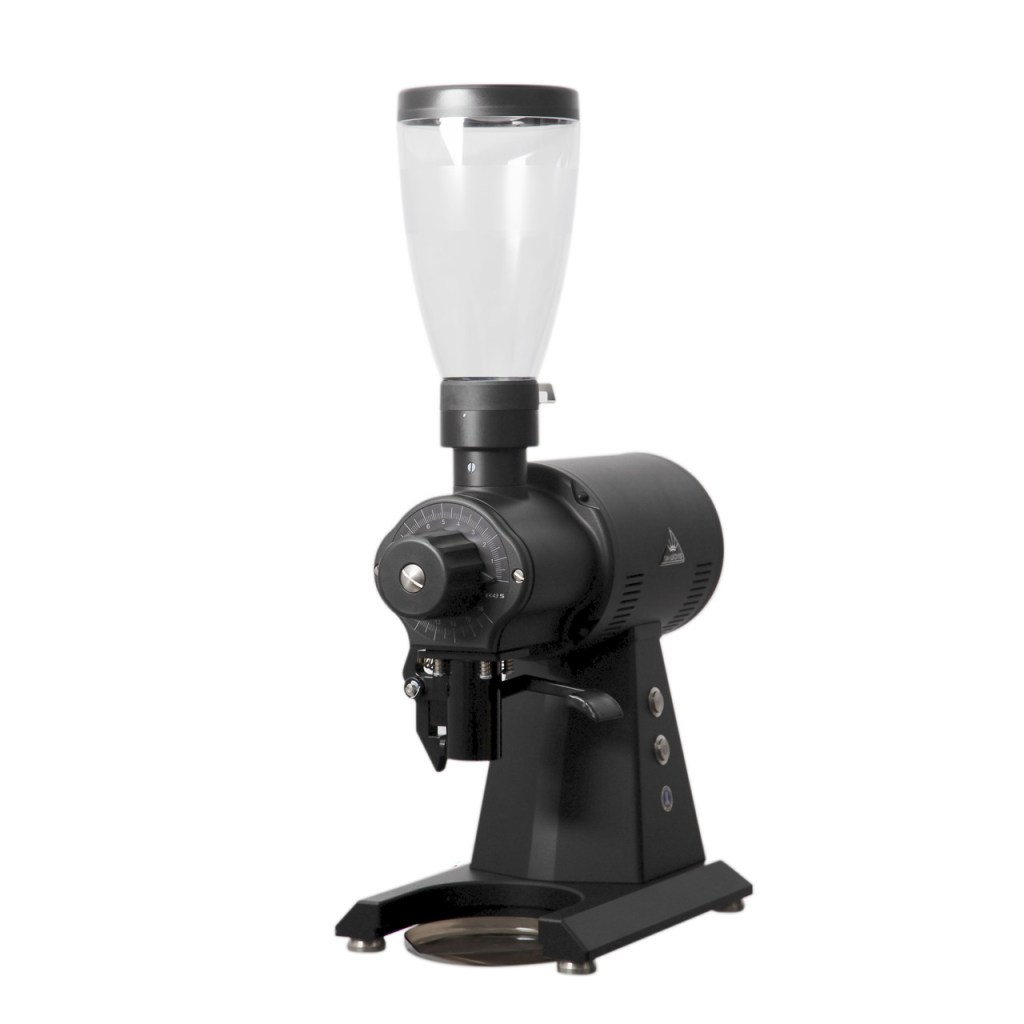
The Mahlkonig EK43S is the short version of the same grinder you will find in many of your favorite cafes. It is a commercial grinder designed to grind large quantities of coffee quickly. While absolute overkill in a home environment it is a strong performer and if you like the design will pair with any of these machines. 


How to Make Better Coffee. 10 Easy Steps to Improve Your Coffee.

While doing research for my posts I noticed that a lot of people have the right equipment to make great coffee, but aren’t following the right process to make great coffee. If your process works for you, then keep it, but if you think you have room for improvement, here are some suggestions:

  1. Buy better coffee, but better doesn’t mean more expensive. Great coffee doesn’t need to cost a lot, it just needs more thoughtfully sourced. For less than the price of coffee pods, you can get amazing specialty coffee. Read our full guide on buying coffee and also our guide on green/specialty coffee. Fresh and locally roasted whole bean coffee consumed 3-18 days (generally) post roast will have peak flavor. That doesn’t mean coffee is undrinkable after that, but I would not buy coffee that is over one month post roast. If your coffee doesn’t have a roast date and only a “best by” date, then don’t buy it. For this reason I don’t recommend buying coffee online unless it is from a specialty roaster with recent roast dates, otherwise you could be getting coffee that is months old. Explore light and medium roast coffee as that is where most of the origin flavor will come out, the darker you roast coffee the more they all start to taste the same. If you have the time, roasting your own coffee can be the most economical (and fun) way to get fresh specialty coffee, learn how here.
  2. Brew with quality water. Brewed coffee only has two ingredients being water and coffee, so make sure you are using good quality water. I use tap water for my coffee, at a minimum I recommend you run your water through a pitcher filter. You can get a decent under sink filter for pretty cheap also. What I use is this under sink filter which connects directly to my faucet. The filtration is good, and I don’t suffer a reduction in flow rate like you do with the other types of under sink filters and reverse osmosis system, these systems will do a better job with filtration, but have limitations such as using more water or having to have a second faucet with low flow rate. If you live in an area with hard water, it might be worth considering a water softener for your home, it will help with more than just better coffee, but help with soap scum and washer and dishwasher efficiency. If you really want to get crazy you can buy distilled water and add these Third Wave Water mineral packets for what they claim to be the optimal blend for coffee, I haven’t tried this as I really don’t like buying bottled water other than for emergency use.
  3. Measure your coffee by weight. This one is huge, I wish coffee companies would stop recommending using scoops and cups to measure coffee. See our coffee recipe charts for information on how to dose coffee and check out our post on why we should measure by weight. Also check out our recommended kitchen scales.
  4. Grind your coffee as close to your brew time as possible, preferably right before you brew. Coffee needs to be ground in an even and consistent manner for best results, blade grinders do a bad job at this so it is recommended that you get a burr grinder. I have a friend with a good coffee maker and a good burr grinder and was buying whole bean coffee and grinding the entire bag at once for the week, this is not recommended. For this reason, do not buy pre-ground coffee as it starts to become stale right after grinding. Now, the other day I had to wake up at 4am, so I ground my coffee the night before and put it in the coffee maker with a dry filter paper and scheduled a 4am brew so I didn’t have to wait for it.
  5. Adjust your grind size. Not all brewing methods use the same grind size, not all coffee types use the same grind size. Even between the same exact model, two grinders may not produce the same grind size. You could be using the same brew method with the same coffee beans and need to use a different grind size due to the size of the brew. For example with pour over, everything else being the same if you are brewing a smaller batch you should grind finer, and if you are brewing a larger batch you should grind coarser. These may just be one step difference in either direction, but the recommendation is keep grinding finer until the bitterness starts to come through, then adjust it back coarser for optimal extraction. If your coffee is coming out too weak or sour, that likely means you are grinding too coarse and should grind finer. For most brew methods, grind adjustment should be your primary method for modulating taste, not adjusting the ratio or other factors.
  6. If you are using filter paper, rinse it with hot water first. This can be hot tap water if you don’t have a water warmer or extra water from your kettle. You’ll get better results from bleached/white filters papers than the natural/brown ones. The brown ones are compostable which is good, but the white ones have less paper taste and are are bleached using a process called oxygen bleaching and are safe to use. Many coffee makers come with reusable screen filters, however I find that using paper filters has the best results, if you are worried about waste you can also try a cloth filter. As I mentioned above, only rinse the filter if you are going to brew right away, if you are setting an auto brew then leave the filter dry. This will also help to pre-warm your brewer which many people suggest.
  7. Use the right brew temperature. Another huge one. For a home coffee brewer, the Specialty Coffee Association (SCA) recommends a brew temperature between 197.6F and 204.8F or 92C and 96C. For methods like pour over, French Press, AeroPress, Hario Switch and Clever Dripper, we recommend you use water that is fresh off the boil. You can save yourself money on buying a kettle without variable temperature and just use water fresh off the boil. If you are using a coffee maker, you can try to measure your brew temperature as close to the source as possible with a probe thermometer. Water loses temperature very fast, when I was testing coffee makers sometime I would think something was off with the temperature because I would run a brew without coffee or filter into the carafe, and by the time I tested the water after a brew it was 15-20F colder than what I measured when it was coming out of the filter basket. I would say, if your coffee maker is putting out water more than a few degrees lower than 190F, may be time to consider a new brewer. We have reviewed many brewers, both SCA and non-SCA certified, check out our recommendations here
  8. Stir, not swirl, before drinking. I know it sounds like a cheesy James Bond quote, but it does make a difference. Coffee tends to stratify during the brewing process. Swirling doesn’t work as well as stirring with a spoon or stick to eliminate the stratification. Some coffee makers like the Ninja or Moccamaster have a brew straw or tube in the carafe to prevent stratification, but most don’t.
  9. Try the coffee black first. Especially with fresh roasted specialty coffee, drink it black before adding milk, dairy alternative or sugar. You may be amazed by some of the notes and aromas you will get. Also, if your coffee is too hot you may not be able to taste it properly. Coffee may taste better between 122F and 129F or 50C to 54C, so try to drink it as it cools a little. If you are fancy you can get an Ember Mug to keep your coffee at an ideal temperature, or worst case you can microwave your coffee to reheat it. A thermos is a great way to keep coffee warm, but I know some people don’t like the feel of drinking from a thermos vs a mug. We don’t recommend keeping your coffee on a hot plate as it will cook your coffee and the taste will suffer, for this reason we recommend a good thermal carafe or that you transfer your coffee off a hot plate within 20 minutes.
  10. Take good care of your equipment. With the exception of grinder burrs (just use a dry brush for these and never wet them), you can hand wash most of your coffee equipment, such as your carafe, filter basket, french press and pour over drippers with mild soap and water. Clean your grinder regularly, use a dry brush and/or an air blower to clean out all the grounds and burrs. If you are using super dark and oily coffee (which we don’t recommend), you can try grinder cleaning tablets. Make sure to descale your coffee maker regularly with white vinegar or descaling solution. I like to keep the filter basket holder and shower head on my coffee maker open to promote faster drying. Even your Moka Pot should be hand washed with mild soap and water, many people believe you should not wash these with soap similar to what people said about cast iron skillets. Never place aluminum, like a Moka Pot, in the dishwasher because dishwasher soap is different than regular dish soap and will cause aluminum to oxidize and damage/discolor it. Random fact, for those of you who were taught to never use soap on a cast iron skillet, the guidance is now that it is ok to use soap and water with a cast iron skillet. Don’t believe me, see for yourself.

One last tip – Take notes. I know this sounds crazy to some people, but use your phone or take down some notes on the coffee and what you thought. Did I like this roast level? Did I like this origin? Should I adjust the grind the next time I brew this coffee? Only change one variable at a time to dial in your best brew, for example don’t change your grind size and change the ratio at the same time. Coffee is very personal and there is no right answer to what is the best coffee. I tend to really like coffee from Africa and Central America. Someone else could really like coffee from Indonesia and South America, so try different kinds and keep notes as to what you like. 

  • See our guide on how to pick the best brew method here.
  • See our coffee recipe charts here.
  • Check out all our recommendations here.

What’s the Best Coffee Brewing Method?

We have posts on the most common brew methods for making coffee already, so we wanted to help you find the best brew method. This will depend on your lifestyle and be an individualized decision, but here are some pointers on how to pick the method that suits you the best.

Immersion vs. Percolation

Immersion methods, such as the French Press, AeroPress, Hario Switch and Clever Dripper (the last three also use a filter), tend to be much more forgiving than percolation methods. Testing has been done with varying grind sizes with immersion methods, like the French Press, and they were all drinkable. If you use the wrong grind size on a percolation method, like a pour over, the result could be undrinkable. Cold brew is another immersion method that is easy to make in large batches.

Percolation methods, such as the pour over method or using a drip coffee maker are less forgiving than the immersion methods because water is passing through the grounds/filter once instead of being immersed in water for a set period of time.

One of the most important variables in making coffee is the grind size, that is why we always recommend grinding your own coffee by weight with a burr grinder so you can adjust the grind size to get the optimal extraction. With immersion methods like the French Press, the recommended ratio is 60-75 grams of coffee per liter, so you can adjust the ratio to taste. This is because at a certain point you get diminishing returns with coffee extraction with immersion/steeping in hot water. If you wait longer you won’t extract more coffee taste, so you need to add more coffee.

With the percolation methods the recommendation is to grind finer until you taste bitterness then adjust the grind back coarser a little to ensure optimal extraction. If your coffee is sour or weak, keep adjusting finer until you can dial in your right grind size. Make sure you are using clean fresh water fresh off the boil and quality coffee. With percolation we try not to change the coffee to water ratio, only the grind size to modulate our coffee taste. This is because we only get one chance with percolation for the water to pass through the grounds, so we need to ensure we have the right grind size, grind evenness and surface area of the coffee for the coffee to extract properly. Even the thickness, speed and shape of the filter can impact this because we need to make sure the draw down time is not too long or short know how it impacts our extraction. Overall, percolation needs a little more effort to dial everything in, but I believe it has better results for the extra effort.

For 1-2 servings of coffee

I consider a serving to be about 12 oz since that is a typical large coffee mug with some room left in it. My usual brew size is 700 ml to make two servings.

If you want less than 12 ounces, we recommend using the AeroPress which can make about 6-7 oz of coffee. It is easy to use and has great results and also easy to travel with or bring to the office. It makes some of the best tasting coffee, but the brew size can be limiting. The AeroPress comes with paper filters, but can also be used with metal filters.

For about 12-14 ounces, try the Hario Switch, this is also an immersion brewer with a filter that is easy to use and makes great coffee. It combines the best of a French Press and filter coffee, I find the coffee to be somewhat muted using this method compared to an AeroPress. You can also use this brewer for pour over coffee.

Pour over is a great method that can make up to about 27 ounces of coffee for two full mugs. This is the method I use most mornings and requires some more attention, but I believe it has the best results if done correctly. Most people use paper filters with this method, but you can also find reusable metal and cloth filters.

French Press is a method that can make small or large brew sizes depending on the size of your vessel. Some people don’t like French press as all the oils are retained due to the absence of a filter which results in a different taste and texture from filtered coffee. This is a personal preference if you prefer having the oils in the coffee or prefer filtered coffee. Using permanent metal filters instead of paper filters on the other methods discussed here will also allow the natural oils in coffee to stay in the brew.

For 3-4 servings of coffee

For these brew sizes your best bet is to use a larger French Press for immersion or a coffee maker for percolation. Once you find the right grind size, a good coffee brewer with proper brew temperatures will make you a great cup of coffee. Many coffee makers come with metal filters, but I prefer using paper filters for a cleaner cup. Check out the review of our favorite brewer here.

You can also make cold brew in large batches in the refrigerator. The cold brew process makes the coffee less acidic, but you may also miss some of the notes in the coffee compared to a hot brew.

What about Espresso?

If you’re interested in espresso and more home barista stuff, know that it is quite a commitment, we talk more about espresso here. AeroPress and Moka Pot can get you some espresso-like results, especially if you’re making milk based drinks, but it isn’t the same as using an espresso machine due to the pressure levels required to make true espresso.

Best Dairy Alternative for Brewed Coffee

We got a request for a post about the best dairy alternative for brewed coffee. We didn’t look at dairy replacements for espresso-based drinks, because some of those have added gums, emulsifiers and fats that help with steaming, frothing and latte art. If you have issues with the milk alternatives curdling, you may need to try the “creamer” version of these plant milks. Another tip is not to pour the milk into the coffee until it cools a little.

When brewing specialty coffee, we always recommend to at least try the coffee black first, and if you really need to then you can add milk. So, with that disclaimer out of the way, some people just like a little milk in their coffee, so what are the best options? Another way to avoid curdling is to add the milk in first and slowly add the coffee, for those of you committed to drinking coffee with milk.

First thing is why do you want a dairy alternative? Is it for sustainability & environmental reasons? Lactose intolerance? Trying to lower calories? Are you going vegan? Allergies? That will help you pick from the options below.

Second, we only wanted look at options that were unsweetened and would not change the flavor of the coffee. For example, we did not look at hazelnut, coconut or hemp milk because that has natural flavoring and we wanted something as similar to milk as possible in taste and texture. There is lots of information out there about the sustainability and water usage of these alternatives, feel free to check those out, but essentially all of them have less environmental impact than the production of cow’s milk.

Third, it had to be easy to find. Things we could find at our local supermarket or available for delivery with Amazon Prime/Fresh.

Soy milk, almond milk and rice milk have been around for a while, none really serve as a good milk replacement for brewed coffee. They are too watery and tend to curdle unless you buy the creamer version. Also, from a taste and texture perspective, we don’t find them to be suitable alternatives to cow’s milk. If you’re looking for protein, cow’s milk and soy milk offer the best choice.

The two we recommend are oat milk and cashew milk for options that best mimic the taste and texture of adding cow’s milk to brewed coffee. Oat milk is thick, rich and tastes the most like dairy, if you are worried about calories go for the cashew milk which is a little more watery.

You can also try macadamia milk as a third and slightly harder to find option, it adds more of its own flavor and sweetness than the other two and is a little more watery.

There are links below to the specific products we looked at.

As you can see oat milk has about as many calories as 2% cow’s milk, but less than whole milk. Highest in calories and fat of the alternatives.


Cashew milk has far less calories and fat than oat milk or cow’s milk.


Here is the nutritional information for macadamia milk. It is in between oat and cashew milk for calories and fat.


The following are for reference/comparison:

Here is the nutritional information for whole milk.


Here is the nutritional information for 2% milk.


Here is the nutritional information for 1% milk.


Here is the nutritional information for unsweetened soy milk.


Here is the nutritional information for almond milk.

Stop the Scoop

One thing I’ve mentioned numerous times throughout my blog is that coffee should be measured by weight using a scale. Coffee beans come in different sizes, weights, moisture content and density so using a volume measurement such as a tablespoon or nondescript “scoop” doesn’t tell us much about our coffee recipe. Green coffee loses about 20% of its weight during roasting and there are a lot of factors that can impact the final weight.

The standard for measuring coffee is grams of coffee to milliliters of water. For drip, pour over and filter coffee the mostly widely recommend ratio is 1 gram of coffee to 16.7 ml of water (based off 60 grams coffee per liter of water or 30 grams for 500 ml). Recommended ratios can vary from 1:15 to 1:18, but the best way we can modulate our coffee taste is to adjust the grind size not to adjust the ratio. Since one milliliter of water weighs exactly one gram this makes doing pour over on a scale easy, take the amount of coffee you have multiplied by 16.7 and that is how many grams of water you need to pour. Or take the amount of water you want to use in milliliters and divide by 16.7 for how much coffee to use.

The term “cups” is confusing because in the coffee world it can mean 4 ounces, 5 ounces, 150 ml or 8 ounces depending on the manufacturer of the brewer. You can use a large measuring cup to figure out what your brewer’s markings mean.

I was helping a friend with their coffee recipe once and they told me they used a certain number of tablespoons for every cup of water, once I figured out if they were talking about 4, 5, or 8 ounce cups and I figured out the rough weight of one tablespoon of their coffee, I found out they were using a 1:28 brew ratio, which is a really diluted coffee.

Check our our post about kitchen scales.

Check out the brew recipe guide below and others on the resources page. I find this useful as I measure my water going into the brewer with a 1 liter measuring cup and disregard the markings on the machine.

If you really can’t weigh out coffee every day because you don’t have a scale at work, are traveling or just don’t want to deal with it, what you can do to try and improve your coffee recipe is, for each type of coffee you use, weigh how much one “scoop” is so you can try to hit the correct ratio when brewing. For me using a level “scoop” that came with my grinder I get between 10 to 11 grams of coffee, which isn’t that exact, but at least I have a baseline for roughly how many scoops I need. For example, to get 30 grams for a 500 ml brew would be about 3 scoops.

Another way is that if you have a grinder with a timer like I do, you can figure out how many seconds it takes to grind your desired amount. Not always exact, but better than nothing. If you use this method you can keep beans in your grinder hopper if you stick with one type of coffee bean. I often change my brew size so this wouldn’t work well for me, if you have a daily brew size it may work for you. Some higher end grinders include a scale and the option to dose by weight or to program grind times for different doses.

I mentioned before that my process is to keep my grinder hopper empty and weigh out my coffee beans then grind until empty. I found this the best way as I rotate through a lot of different types of coffee throughout the week. Most grinders do retain some grounds so if you don’t want to mix your coffees give your grinder a good cleaning when switching out coffee or you can grind a few grams of your new coffee to flush out the old grounds before dosing. With larger brews this makes less of a difference so I usually just switch coffees without worrying about retention. They have grinders made and marketed for low retention, but they are usually well into the $400 to $800 price range.

Friends Don’t Let Friends Use Coffee Pods

Like many of you, my morning coffee routine involved popping in a Keurig or Nespresso pod and filling up a thermos on my way to work, these pods cost about 50 cents each on average, average is also the nicest word to describe the coffee in these pods.

If you follow the drip coffee ratio that most roasters suggest of 1:16 to 1:17 (grams of coffee to milliliters of water), your K-cup is designed to make you about 6 fluid ounces of coffee. Yes, most Keurig machines have different size options, but you’re just drinking more diluted coffee when you pick anything larger than the 6 fluid ounce size. The “strong” setting on your Keurig machine just adds an extra 30 seconds to your brew time to try and improve the extraction.

I was curious how much coffee is actually in one of these pods, the answer is 7-12 grams for a K-cup and about 5-6 grams for the small Nespresso pods. For Keurig you’re paying about $1.42 per ounce of coffee (at 10 grams per pod) and $2.58 per ounce of coffee for Nespresso (at 5.5 grams per pod). A quick search will show you that “premium” coffee usually costs about $1 an ounce and local roasters charge about $1-1.50 per ounce of specialty coffee, so about $16-24 a pound. With pods you’re paying about $23-41 per pound of coffee.

The frugal side of me wanted to find a better option. Why am I paying premium prices for stale below average coffee? The most common answer is, convenience. People need to get their coffee and get out the door. You may be saying well it is cheaper than Starbucks and tastes about the same. While we have to give credit to Starbucks for growing the coffee culture in America, Starbucks coffee is not recognized as good coffee in the specialty coffee world. Compare that to coffee you can get at a shop that roasts their own single-origin beans or does made to order pour over and the difference will be huge.

I found an old ekobrew reusable K-cup in my cupboard and bought some pre-ground coffee and started to use that. However, with more reading I learned that you really need to grind your own beans as everything about coffee centers around freshness. You want fresh roasted beans that are freshly ground before you brew.

There are plenty of articles out there talking about the waste generated by these pods, I won’t get into that because so many others already have. I do know some offer recycling programs also, but my main argument against pods is that you are paying premium prices for below average coffee. For less than the amount you spend on pods, you could be getting premium specialty coffee in exchange for a little convenience.

I started researching better ways to make coffee and eventually landed on the pour over method. It sounds like a pain at first, but after some practice I think it is pretty easy with only a few minutes of your attention required. If you don’t have the time for that I’ve written about other methods for single servings and better convenience.

If pods work for you, then keep using them. In talking to friends and family, I noticed so many of them were deliberate about what they purchased and consumed, but when it came to coffee they were paying a lot more for the convenience of pods. Once they realized with a little more effort and less cost, they could get amazing coffee many of them switched over.

Here are some follow-up posts you might find interesting:

Check out our recommendations and product reviews.

How to Buy Coffee

There is a ton of information out there on this topic, in the spirit of my blog I’m just trying to give you the summarized version. This post talks more about how to make sense of specialty coffee labels.

Don’t buy pre-ground. Don’t do it. You already have the burr grinder and scale I talked about in the must haves post. Coffee is all about freshness, you want fresh roasted coffee beans that you grind fresh right before brewing. This is another reason not to use pods, all that coffee is stale and pre-ground, not to mention overpriced.

The peak flavor for coffee is between 3-18 days after roasting, maybe up to a month. I was at my local organic type supermarket the other day and saw a bag of “premium” coffee and the roast on date was over 2 months ago. Notice I said peak flavor, this doesn’t mean coffee is undrinkable outside of this range, but that most agree this is when coffee tastes best.

Coffee tastes best if brewed within 30 minutes after you grind it, so combine the fact that not only is your coffee going to be 2 months old, it will have been ground 2 months ago. At this point, who cares about freezing, vacuum sealed containers or whatever storage method you use, you’re just preserving staleness. If time is an issue in the morning, grinding your coffee the night before and setting a timer on your coffee machine is just fine, it will be vastly better than any pod or pre-ground coffee you would use. I would not advise using the supermarket grinder though, even though it’s just a week that you’d be using it, grind as close to brew time as possible.

If your coffee only has a “best by” date and no “roasted on” date, stop buying it. Simple as this, if they aren’t willing to tell you when it was roasted, it isn’t worth buying.

Try to buy single-origin or single-estate coffee. Lately there is a lot of focus on sustainability and traceability of coffee. You want to be able to know who grew your coffee, where they grew it, how it was processed, how it was shipped and when it was roasted.

Also to know that in every step of the way things have been done in an ethical and sustainable way from fair wages to use of chemicals and pesticides. Coffee is so much more complex than light, medium, dark or french roast, which is the only information you find on most supermarket coffees. Most of what you see out there are blends of coffee beans, while there are some great blends out there from specialty roasters, the supermarket brands use this method to mix low quality beans with average quality beans to give you average tasting coffee. If you find a great local roaster that has both single-origin and blends, I’d say those blends are better than any supermarket blends.

It doesn’t really matter if you buy organic coffee. Many of these small producers are already using organic methods, however to get the organic certification will cost them thousands of dollars, which oftentimes is out of reach or money better spent elsewhere. If you are buying responsibly sourced single-origin coffee I wouldn’t worry if it is labeled organic or not.

Avoid coffee with flavors and additives. Coffee can have some amazing notes, but when you see flavored coffee, that means artificial flavors have been added during the roasting process. Flavors like french vanilla or hazelnut are artificially added, even by some very popular and successful coffee shops (*cough* Philz *cough*).

Explore light and medium roasts. We have been conditioned over the years to think that dark roasted and bitter coffee is “strong” or “bold” (thanks Starbucks) when in reality this is the way the big producers ensure uniformity. Not to say there aren’t some great specialty dark roasts out there, but usually the more you roast a coffee bean the more uniform and bitter it tastes, which means you can use lower quality beans to achieve this. A lot more of the tones and flavor comes out in light and medium roasts, try it without milk or sugar first and see if you can taste them. Also light roast coffee has more caffeine than dark roasted coffee, contrary to popular belief than darker is stronger. Vienna, French and Italian are all dark or darker than dark roasts.

When you find that great local roaster, try the light and medium stuff first and give them feedback and see what they recommend. Usually when I asked people what kind of coffee they like, they answer with medium or dark roast, but coffee is so much more complex than that. Country of origin, geographic region, bean type, growth elevation, processing method and so much more.

Buy from local coffee roasters. Not only are you supporting your local economy this is one of the best ways to ensure you’re getting fresh roasted coffee. They should be able to tell you when a coffee was roasted and offer different types of single-origin and roast levels. There are also many small and independent roasters all over the U.S. that will ship you coffee that is roasted to order or roasted in the past few days.

Or…. Roast your own coffee. Learn how here.

I’m Ready to Ditch Pods, Now What?

The most common reasons people cite for using pods is that it’s convenient or they need to be able to make only one serving at a time. Let’s try to tackle these:

I just don’t have the time to make coffee in the morning. If you’re willing to grind your coffee the night before and place it in the coffee maker before you go to bed, you have many great options available to you. You can basically use any coffee maker that has a timer or the ability to be used with a timer. The Technivorm Moccamaster series is an excellent coffee maker that is highly recommended, however it doesn’t include a timer. Since its power switch can be left in the on position, a workaround for this is to hook it up to your smart plug and set it to turn on and off at certain times. You can even set it up to turn on by saying “Alexa, turn on coffee maker” while crawling out of bed. If you don’t want the trouble of that the OXO Brew 9 Cup is an excellent choice with a timer function, if you have one of their other kitchen appliances the look and feel will be familiar to you. Both of these brewers are great machines, check out all our reviews and recommendations for other options.

Here is a full list of home brewers that have been certified by the Specialty Coffee Association (SCA). Any of these will brew excellent coffee from your excellent beans. Unless you plan to transfer your coffee to a travel mug or cup within 20 minutes of brewing, pick a model with a thermal carafe over a warming plate.

They make brewers that have built in grinders, but those have mixed reviews and reliability issues. For best results you should have a standalone grinder. Those brewers will make better coffee than using pods, but for that extra effort of a separate grinder the results will be better and offer a lot more versatility for other types of brewing also. Also some of the lower end models don’t even offer grind adjustment which is a big part of making good coffee.

Make cold brew. Cold brew is easy to make in large batches and can be kept in the refrigerator for up to two weeks. Use a coarse grind with a 1:8 ratio of grams of coffee to milliliters of water and let it in steep for 24 hours in the refrigerator, stirring occasionally. After that use a sieve to remove the large grounds then run it through a paper filter. Add milk or water to taste. This is one brewing method where you don’t need to use your best and freshest beans, for many this is actually the way they use up stale beans without wasting them. Reduce the ratio to 1:4 for cold brew concentrate and add water or milk to taste. I did another post with more detail about cold brew if you want to check it out.

I need the option to make only one serving. All of the coffee makers mentioned above have the option for making different brew sizes, however for most of them that means adjusting the amount of water in the machine as most will brew until the water runs out. For a multi-serve brewer where you can select a brew size, check out the Ninja CM401. If you are willing to spend a little more time you can look into the pour over process which is my personal favorite. Brewers such as the Hario Switch (makes about 14 fl. oz) or AeroPress (makes about 6 fl. oz) are great at making single servings and easy to use at the office. Your pod machine doesn’t offer size choices, only selections for how diluted you want your coffee to be. So if you think the Keurig is making you a 12 fl. oz. cup, it’s actually making you a 6 fl. oz. cup with twice the water.

Must Have Items To Up Your Coffee Game

Two things you must have if you want to up your coffee game:

Weight vs. Volume

Some of you who have done cooking or looked up a famous chef or baker’s recipe knows that many of them don’t use volumetric measurements. Pretty much any baker or cook outside of the U.S. can instantly recognize an American recipe because it uses volume measurements like teaspoons, tablespoons, cups, pints or quarts.

If you want to make your life easier with coffee, use the metric system. Grams of coffee to milliliters of water (this is where the kitchen scale comes in). A milliliter of water weighs exactly 1 gram so it makes this incredibly easy. Most roasters recommend a ratio from between 1:15 to 1:17 for drip and pour over coffee.

Here is a quick cheat sheet for grams of coffee to milliliters of water following the widely recommended ratio of 30 grams per 500 ml or water or 60 grams per 1 liter of water. Another way is to divide milliliters of water by 16.7 for grams of coffee needed, or say I’m at the end of a bag of coffee and only have 37 grams left, multiply by 16.7 and I know to use 618 ml of water for my brew.

Here it is in cups and fluid ounces, with rounding for convenience. Useful if your coffee brewer only lists cups. *This is based off US cups of 8 fluid ounces. Cups can mean 4, 5, 6, or 8 ounces of water depending on your brewer, try to figure out how many fluid ounces you are using vs. cups to avoid the wrong ratio.

If your coffee recipe involves number of scoops per cups of water, consider switching to a weight based recipe. Coffee beans come in all different sizes and water content and using a volume measure like a scoop is not at all precise.

Check out our post about kitchen scales.

Burr Grinder

The single most important thing to adjust the taste of your coffee is the size of the grind. It is recommended that you don’t alter anything else about your coffee recipe other than the grind size to adjust the taste. So if your coffee is too bitter, the solution isn’t to add more water to dilute it, the answer is to adjust your grind coarser. If your coffee is weak or sour you need to adjust the grind finer. The only way you can get a consistent and even grind, is to use a burr grinder.

A blade grinder works like a food processor or blender and just chops your coffee beans into inconsistent chunks of coffee. Invest in a burr grinder, this will cost anywhere from $80-140 for a decent electric grinder.

For each type of coffee you get, ideally you should adjust your grind finer and finer until you taste that bitterness you don’t like, the adjust it coarser just a little to know you are getting the ideal extraction level.

Check out our grinder recommendations here and our review of two of the most popular entry level grinders here.