The Ultimate Home Espresso Setup

This blog typically focuses on accessible and cost effective ways to make coffee, but just because you drive a regular car doesn’t mean you can’t check out some exotic sports cars once in a while. If you’re the type of person who has no budget and cares about style and having the best, then this blog is for you.

Below are some of the most over the top machines to make espresso at home. These machines are miniaturized versions of commercial machines that you can find in your favorite cafes. We also talk about some high end grinders to pair with these machines. All these machines will be total overkill for a home setup and are all very capable machines. For many of you, what it will come down to is what style and features you want for your setup. Unless noted below these machines can be operated without direct plumbing for easy countertop use. All espresso machines require regular care and maintenance and also perform better when used with filtered/softened water. Some may even require professional installation and filtered/softened water for warranty purposes so don’t overlook that.


The most common “end game” machine you’ll see in the home specialty space is the La Marzocco Linea Mini (LMLM). It only comes with a Manual Paddle (MP) operation and is an absolute beast when it comes to pulling shots and steaming milk. This machine has a lot of aftermarket options and even has companies dedicated to their customization with aftermarket colors and accessories. 


Those who want to take it up another notch will go for the La Marzocco GS3, offered in both Manual Paddle (MP) and Auto-Volumetric (AV) models. If you’re in the market for one of these, you probably already know the difference and your preference, but the AV model allows you to program the volume of water for easy repeatability in pulling your shots. For example, if your partner doesn’t want to be bothered with weighing espresso output, it would be easier for a less experienced home barista to pull a shot on an AV machine.


If you’re a technology lover and like this design check out the Victoria Arduino Eagle One Prima. This machine has a myriad of settings that can be controlled through the app and is designed with sustainability in mind in an effort to reduce water and electric usage. This machine offers auto-volumetric capabilities for easy to repeat shots.


The Slayer Single Group is the most expensive machine we list and really leans toward commercial use as this machine requires plumbing to be operated. This means you’ll need to have someone cut a hole in your countertop for the cleanest looking install. This machine only has a manual paddle for operation. You’ll see this same machine in multiple group head configuration in the most trendy specialty coffee shops.


The Option-O Lagom P64 is one of the best single dosing grinders money can buy and will pair nicely with any of the above machines. 


The Mahlkonig E65S GbW is a commercial grinder that has the feature to Grind by Weight. If you’re pulling consecutive shots the speed offered may be of interest to you. Otherwise I’d stick with a single dose grinder


The Mahlkonig EK43S is the short version of the same grinder you will find in many of your favorite cafes. It is a commercial grinder designed to grind large quantities of coffee quickly. While absolute overkill in a home environment it is a strong performer and if you like the design will pair with any of these machines. 


Tesla Solar Roof Tiles – System Activation – Part 3

My Permit to Operate (PTO) was approved at the end of September 2021. I have had my Tesla Solar Roof Tiles active for a few months now and wanted to share an update.

Following the install of the roof tiles, Southern California Edison (SCE) came in July 2021 to install a new power meter with higher amperage. At this time I took a photo of the new meter and sent it to Tesla to complete their Net Energy Metering (NEM) application with SCE. After this SCE rejected the new NEM application stating that the meter number was incorrect, this was strange to me since I sent all parties a photo of the brand new meter. SCE said it was no worry that Tesla just needed to submit a new application with the meter number blank and they would populate it later. SCE was not able to just go ahead and process it or remove the meter number themselves. After a few days of trying to track down Tesla they submitted the new change at the end of August 2021. 

SCE kept giving me the run around saying it would take weeks for the information in their system to be updated internally and that there was nothing that could be done to expedite it. Only when I reached out directly to the planners with SCE did they finally realize the crew that installed the meter did not capture all the information needed to move forward with the NEM application. In Mid-September they came back out and took some additional information from the meter and at the end of September 2021 I was issued my Permit to Operate (PTO). The sun was still out so I turned on my system on that same day. 

A little bit of a side story is that when we first moved into our home we noticed power surges, where if a high energy appliance like the dryer or garbage disposal would turn on the lights would dim. These lights often were not even on the same circuit or sub-panel which was strange. It was finally determined that the SCE power and neutral line to the transformer failed and was damaged. Interesting because nobody from SCE noticed this when they came to install the meter or during the second visit. Only after we called for a “trouble ticket” did SCE send a third crew out and determine the wires were in bad condition with exposed wire and immediately shut off all the power to the block to correct the issue in an urgent manner.

Months prior I had asked Tesla how I could monitor my power production and they had someone drop off an internet gateway to connect to my router via network cable in order to track my energy production online. If I hadn’t reached out I don’t know that anyone was going to provide me one of these units. Note: This is only needed if your inverter is manufactured by a third party, if you have a Tesla branded inverter or Powerwall you should not need this.

SCE will push you onto a Time of Use (TOU) plan when you start NEM 2.0, after July 2017 all solar users in California need to be on a TOU plan. It isn’t as simple as taking how much power you produce minus how much power you use and netting that out, they actually credit you and charge you different amounts depending on the time of day you are using and producing power. The most expensive time of day to use power on these plans (may vary depending on what you pick) is 4pm to 9pm. However, most of our power will be produced between 9am and 5pm, with peak production around noon/afternoon.

Peak solar production (in Southern California) is between March and September, with an estimated 65% of solar production happening during those six months. Since my system went active at the end of that, October was the first month I produced one megawatt hour.

October 2022 Energy Production

With TOU, you are charged different rates depending on when you use power. I am on the 4pm to 9pm for peak rates plan, there is also a 5pm to 8pm and another plan that is for people who have an Electric Vehicle (EV).

Rates as of Jan 2022

This is important because your energy production is only netted out depending on when it was produced. So it isn’t as simple as saying I use 40 kWh in a day and I produce 42 kWh in a day so I should not have to pay for power. When you use and when you produce comes into play, almost all of your production will take place during Super Off-Peak hours or Off-Peak hours and be worth less for energy offset if you are using a lot of power during Mid-Peak or On-Peak hours.

Most of your energy production will take place during Off-Peak hours.
Sample Usage Breakdown with SCE TOU
Sample Bill with NEM and TOU

As of February 2022, the California Public Utility Commission (CPUC) wants to further reduce the value of power generated by solar owners. This is currently being met with big pushback from solar owners and the installation companies, regardless of what happens, NEM 2.0 users will be grandfathered in for 20 years from their PTO date. However, this would make new solar installations must less attractive if this plan is adopted without major changes.

I hope to do a follow-up once Summer comes around and again after one full year to see how my system is producing compared to the estimates from Tesla.

If you want more information or are interested in ordering, please use my referral link to save $500. This link can also be used to order a Tesla car and you will receive free supercharger credits.

Hario Switch – Dual Purpose V60 Dripper – Brew Guide & Review

The Hario Switch is very similar to the Clever Dripper immersion brewer that we previously did a brew guide on. However, the Switch can also be used as a regular pour over dripper for added versatility, and it also uses V60 filter paper. At the bottom is a switch that moves a stainless steel ball up or down to open and close the valve. Leave the switch open and you can use it as a regular pour over dripper.

In our brew methods post we talked about how immersion brew methods tend to be much more forgiving than percolation methods, so this is the best of both worlds. Immersed coffee tends to have more body while a pour over has a cleaner cup with more clarity, try it both ways to see how you like it. With immersion brewing on the switch you just add hot water and stir and let it sit there for 2-3 minutes (detailed instructions below), if you forget the timing or don’t have the perfect grind size the coffee won’t be ruined, you should still have a very drinkable cup of coffee. If you mess up the timing or grind size on a pour over you can taste the results. 

One of the things that you may like with the Hario Switch is that the construction is glass and silicon rather than plastic like with the Clever Dripper. The filter papers is uses are the same as for V60 pour over, which may or may not be a plus since the Clever Dripper uses #4 cone filters that are used in many coffee makers and more easy to find.

The glass portion of the Hario Switch is the same as their glass pour over dripper, so if you break it you can easily replace it. I always recommended getting the 03 size so you can scale your brew up or down as you need, one thing about the Switch is that the diameter of the base is a little wider so you may have trouble putting this onto a travel mug or narrower mug, most “normal” sized mugs should be fine. Pair it with the Hario Beaker and you won’t have any issues.

They sell the 02 size in a set with the smaller beaker which if you know you won’t need to make larger brew sizes this is a good option. The large beaker is marked to 600 ml and the smaller beaker is marked to 300 ml, there is some space above the top marking so you won’t overflow.

The Hario Switch V60 Set in 02 Size, we recommend the 03 size for bigger brews.

What you will need:

Instructions:

  1. Boil the water in your kettle, it doesn’t matter if you have a gooseneck kettle or not.
  2. While your water is warming, using the recipe sheet and on the resources page, grind your coffee by weight to a medium/fine ground, similar to table salt. I would use a maximum brew size of about 450 ml, so for this example we will use 27 grams of coffee for 450 ml of water.
  3. Insert your V60 filter paper and rinse with hot water with the switch open. Dispose of the water.
  4. Place Hario Switch and Beaker on your scale and tare to zero with the switch closed.
  5. Add the 27 grams of coffee.
  6. Add 2-3x the weight of coffee of hot water and swirl to bloom for 30 seconds. Ensure all grounds are wet.
  7. Add the remaining water until the scale reaches 450 grams. (You can also try to add the 450 ml of water first and coffee second without bloom, this will aid in a faster drawdown time, see which you prefer.)
  8. Allow the coffee to steep for another 2:00.
  9. At the end of the steep stir the crust. Wait another 15-30 seconds after the stir to allow the grounds to sink.
  10. Flip the switch to the open position to begin the drawdown into your beaker
  11. Stir the coffee before serving.

Technivorm Moccamaster 79312 KBGT Coffee Brewer Review

Moccamasters are iconic coffee brewers, they are SCA certified home brewers and many people love their styling to accent their kitchen countertops. They come in at a premium price point but don’t feel overpriced since they have a solid build quality and reputation. These brewers are hand made in the Netherlands and backed by a five year warranty, something that is unheard of for countertop home appliances. After the five year warranty they will repair any brewer for life (for a fee), something to consider for those of you who hate that most kitchen appliances end up in a landfill after their serviceable life. Most other brewers we review have a one year warranty, after which internal replacement parts are usually impossible to find. You may be able to find a carafe or filter basket, but if the machine’s internals fail you can only throw it out.

The Technivorm Moccamaster 79312 KBGT Coffee Brewer is the version of their brewer with a thermal carafe and has an auto-drip stop feature. The Technivorm Moccamaster 79112 KBT Coffee Brewer version has a manual drip stop that has a full, half open and closed toggle. This is useful if you want to be able to better control the flow rate from the filter basket for different brew sizes. However, as I have said the best way to modulate our coffee’s taste is by adjusting the grind size. I adjust the grind size as needed and allow the more automated KGBT to do its job with brewing, finer for smaller brews and coarser for larger brews. These machines also use a pulse brew method from a shower head that is similar to the way the Oxo and Zojirushi brew, which takes a little longer and yields higher extraction. For this reason if you are using pre-ground coffee, it may tend to be over extracted. 

The KBT has a manual drip stop on the filter basket. We reviewed the KBGT with auto drip stop.

The Moccamaster 53933 KBGV Select Coffee Maker is the classic model with a glass carafe and comes in about 20 different colors to match any decor. However, we advise against using a glass carafe and heat plate as it will start to cook your coffee and degrade the taste after about 20 minutes, for this really we usually recommend brewers that either include a thermal carafe or allow you to brew into your own. Brewers with auto drip stop require that you use the provided carafe or they won’t work. 

The KBGV comes in many colors, but only has a glass carafe.

Bottom line is the brewer makes great coffee as you would expect from any SCA certified home brewer. The carafe has a brew straw to prevent stratification and keep the coffee mixed as it brews. The carafe is solid build quality and no complaints other than the round top makes it hard to do precise pouring, but I never had any issues with spilling or dripping. 

The water tank is attached to the brewer and not removable, the lid is removable. The standing filter basket has its own lid that sits on a perch over the carafe. Once you insert the carafe into the KBGT it will lift the drip stop lever to allow coffee to flow down from the filter basket. There are no settings on the machine other than on and off, however as it is a physical button you can set the machine up the night before and use it with a smart switch if you want to add an aftermarket timer function

If you have standard height kitchen cabinets this brewer is not friendly and would need to be pulled out for refilling water. Overall the workflow is decent, but not as easy as other brewers we have recommended on this site. The filter basket needs to be set a certain way and then you have to place the cover on both the water tank and the filter basket. It is really nit picky and most people who don’t review as many coffee makers as I do won’t even notice, but compared to the Ninja and Oxo I just preferred the workflow on those better. 

I think this machine is worth it if you really like the style as well and appreciate high build quality and a long warranty with continuing commitment to service for the machine’s life. The lack of programming options may be a downside for some, but that can be overcome with a timer or smart switch. I may be unique in that I only brew for 1-2 cups of coffee at a time and do not brew traditional large batches of coffee that I use to refill, for this reason I always find myself going back to use my Ninja to brew directly into a mug or else my AeroPress or Pour Over.

See the KBGT user manual here

The Best Batch Brewer – Oxo Brew 9 Cup Coffee Maker

The OXO Brew 9 Cup Coffee Maker is a popular option that has a price point that lands it firmly between high-end and mid-range, however it’s build quality and features lean more toward the high-end. The brewer is SCA Certified, which is an important feature and brews by pulsing hot water over the grounds, rather than having a pre-infusion followed by a constant flow of water like many other brewers we have reviewed. This results in high levels of extraction which means you will likely need to refine your grind size. I noticed this when using the same grind size between my Ninja CM401 and the OXO Brew 9 Cup that the OXO tended to be much more extracted. OXO also makes an 8 Cup brewer that is non-programmable, however we liked the fact you could program the OXO 9 Cup to brew automatically at a set time. 

Other than setting the brewer for large or small brews, auto brew is the only programmable feature on this machine. You do not have the option to adjust brew temperature or length of brew. The operation of the machine is simple, but not intuitive. I had to refer to the manual to learn the basic features. I own other OXO products as well and with those, I am able to operate the machine intuitively. Brew temperatures were very good and held between 190F-195F, SCA certified machines need to brew within a certain range in order to obtain their certification. 

The brewer itself has a pretty large footpoint and is quite tall, if you are placing it under a standard height kitchen cabinet you will need to pull the machine out in order to open the water tank (non-removable) or filter basket housing, not a big deal normally, but I like to keep them open to air dry, however on this brewer you cannot open both at the same time and opening either would interfere with opening/closing of your kitchen cabinets. 

The included thermal carafe feels high quality compared to the Zojirushi carafes that I have. However, as is the case with many thermal carafes, it is hard to pour out the last bit of coffee without removing the lid and turning it almost all the way upside down. The carafe includes a silicone straw to help prevent stratification in the brewed coffee to mix the coffee as it goes through the #4 size cone filters. The brewer has an auto drip stop so you can only brew into the provided carafe.

Overall, a solid brewer at a good price point. If I mostly brewed larger batches, I would definitely consider this machine. I normally only brew 1-2 mugs worth of coffee at a time so I use the Ninja CM401 quite a lot to brew directly into a mug or small server. This machine will brew until the water tank is empty, so have a look at our recipe charts for how much water and coffee to use with this machine. This brewer’s cup units are 5 oz of water so you can brew a maximum batch size of 45 oz.

Click here to read the manual.

Zojirushi Coffee Maker – 10 Cup with Thermal Carafe Review

As someone who is a big fan of Zojirushi rice cookers, water boilers/warmers, travel mugs and carafes I wanted to check out the Zojirushi EC-YTC100XB Coffee Maker. I was able to find this brewer at a good discount and at the time I was actually shopping for one of their thermal carafes when I saw this. 

A common complaint about thermal carafe coffee makers is that their carafes are low build quality or poorly executed, I figured this should be an area where the Zojirushi shines. The brewer is not SCA certified as most of the other brewers that I review are, however one of their marketing features is high brew temperature of 200F, in my testing I found brew temperatures at the filter basket to be around 190-195F.  

The machine is programmable for timed brewed, but other than that only has options for muting the beep and a faster “time saver” brew mode. It is thoughtfully designed to have a removable water tank and a swing out design for the flat bottom filter basket, which makes it a great choice for placing under a kitchen cabinet. Most other brewers have lids that flip up and will interfere with a standard height kitchen cabinet. 

As expected, the brewer comes with a high quality thermal carafe, it doesn’t drip and feels solid. As with many other carafes it does retain a little bit of coffee inside where you almost have to turn the carafe upside down or remove the top in order to get the last few drops out. The brewer has an auto drop stop feature were you can only brew into the provided carafe. 

I personally don’t find the brewer to be aesthetically pleasing or displeasing, it is pretty much neutral as you would expect with other Zojirushi home appliances. I had this sitting next to my Ninja CM401 during this testing period and found myself using the Zojirushi more often because of the thermal carafe. The Ninja CM407 is the version of the Ninja Specialty Brewer with the thermal carafe, but when I was shopping and even now, the thermal carafe version is much harder to find and costs a lot more.

The brew cycle is slower than most as it uses pulse brewing through the entire brew, you can use the time saver mode to make this go faster which has a more continuous flow of water. I read another review where it said this brewer made very bitter coffee, I did not find this to be the case. With every coffee and every brewer you will need to adjust your grind size to get optimal taste and extraction. Perhaps if you were using this pre-ground coffee you might have some issues with bitterness due to the longer brew cycle, that is why we recommend that you always freshly grind your own beans using a burr grinder. This brewer’s cup units are 150 ml for a maximum brew size of 1.5 liters or approximately 51 fluid ounces.

Overall, I really like this brewer and would recommend it for people who want a good brewer with a high quality thermal carafe. I use this for mornings where I used timed brew because I know the coffee will still be hot and not have to get cooked on a hot plate like other brewers. I still turn to my Ninja brewer with its option for smaller brew directly into a mug, but for batch brewing I pick the Zojirushi EC-YTC100XB Coffee Maker.

Download the user manual here.

The Best Thermal Mug

For those of us who like hot coffee and hate microwaving cold coffee, an insulated mug is a must have. We wanted to take a look at some popular options out there and see which one worked best for different needs. This whole process took a lot longer than expected, but we are happy to share our thoughts.

Before when more people had to commute, something that would work well for the car was important, however with many people now working at home we may have different needs. Here are some of the different use cases I considered:

  1. I need something to use on my commute. Ideally should have one handed operation and easily fit into a car cup holder and be leak proof.
  2. I will use this mostly around home and want to keep my coffee warm between cups and have a nice drinking lip.
  3. I need to keep my coffee hot for long periods of time.

The list of mugs we looked at kept growing as I saw things I liked and didn’t like about the different mugs that we tested. Here are the mugs we took a look at:

If you’re looking for the best thermal retention, the Zojirushi mugs or Fellow Carter win that test. I preheated each mug with the same amount of water and then took the temperature 2 and 12 hours after sealing with the same amount of freshly boiled water, all temperatures in F. The downside to the Zojirushi was that cleaning was the most involved out of all the mugs with multiple parts to clean. See below the results.


For best use for commuting in a car I found that I kept going back to the Stanley because it is really easy to clean and had easy one handed operation, it also felt the most like drinking from a mug with the plastic drinking lip. The Contigo had the second best ease of use, but I felt like drinking from it was similar to using a sippy cup and not a mug. The Contigo was also tended to leak with hot liquids. The Zojirushi mugs have a decent drinking lip, but the flip top lid can be a little awkward and the round lip can feel too narrow when trying to drink from it. All of these options had a plastic lip which offers a different experience than drinking from metal like some of the others.


The Fellow Carter Everywhere or Move and Yeti mugs offered the most similar experience to drinking out of a mug, but I didn’t like the two handed operation on the Fellow and wasn’t convinced the splash screen with the Move would do much to stop splashing on the road if I hit a big bump. These are the best options if you work from home and don’t need to commute. The Carter Everywhere is wider and shorter than the Move and I felt that the width felt more like holding a mug. I liked being able to cap the mug if I had to do something and return to a still hot cup of coffee.


The one I did not like was the Fellow Carter with 360º Sip Lid, for a company so well known for product design and user experience they really missed the mark. I know what their goal was since people didn’t like the two handed operation with the standard lid so they wanted to come up with a solution that allowed people to sip one-handed. It comes with a magnetic “umbrella” that is easy to lose and I don’t know what it actually does because it will splash with or without it. Overall, really disappointing, but would high recommend the Carter Move or Everywhere for home use.

Many of these mugs come in different sizes and color options, I went with 12 to 16 oz mugs for using at home or for driving to work. I went with 20 oz mugs if I was going to be out and about for a while and needed that extra bit of coffee to keep me going. Overall, I feel like this search for the best mug was a descent into madness for me with all the options, but I’m pretty happy with the mugs I ended up with for my needs. Some of you may be wondering about the Ember Mug, but after doing a lot of research I am still holding out for design improvements in future versions or from competitors.


Contigo 16 ozZojirushi 16 ozZojirushi 20 ozStanley 16 ozFellow Carter 16 ozYeti 14 oz Mug*
After 2 Hours161.8185184.5169.5181.6145.6
After 12 Hours96.8133.7135110.5125.179.5

*The Yeti is more of a traditional mug and was included as more of a home use mug because I felt that was a better match up against the Fellow Carter, which was a great mug, but because you need two hands to open and close it I didn’t think it was good for using while driving. The downside on the Yeti was that I preferred using it without the lid, causing the coffee to cool too fast, but because it was metal I couldn’t microwave it like a normal mug. Now I just use it for heating bottles for the baby since it keeps heat better and longer and porcelain.

**The thermal testing didn’t include some of the late additions from the Fellow line.

Breville Barista Pro Review and Introduction to Espresso


If you want to dive into the world of home espresso, the learning curve can be steep, but some of the consumer grade appliances made by Breville can help make it easier. I originally wanted to purchase a no frills espresso machine like the Gaggia Classic Pro or Rancilio Silvia that come highly recommended as starter machines, but require much more manual operation. However, I was able to find a great deal on a Breville Barista Pro, which is the upgrade model to the very popular Breville Barista Express. You are able to program your shot volume for easy repeatability in these machines, which cannot be done on the Gaggia or Rancilio that I just mentioned, also these Breville machines heat up much faster and can be used in under a minute after turning on, the other machines recommend up to 20 minutes on time before espresso can be made. An important thing to note is that Nespresso, despite its name, is not actually espresso, neither is AeroPress. Only an espresso machine, electric or lever, can generate enough pressure to make proper espresso

These Breville machines have a built in grinder with similar performance to that of the Breville Smart Grinder Pro. The Pro adds faster heating technology, stepless grind adjustment, a better steam wand, an LCD interface with shot timer and some other small changes such as an angled hot water spout. The Pro loses the pressure gauge that was so prominent in the Express model. If you want to add automatic milk steaming and a touch screen interface the Breville Barista Touch offers those features.

Basics of Making Espresso: 

If you know nothing about making espresso, but are willing to make a little bit of a mess and put in some effort these are great options for home espresso. As always you will want to get yourself a scale, some quality coffee and I’ll list some “nice to have” accessories at the bottom of this post. 

Espresso recipes are stated as grams of coffee in, liquid/crema out, in how many seconds. A good starting point is 18 grams of ground coffee in, 36 grams of liquid out in around 30 seconds. You will want to adjust your grind size coarser to help the shot pull faster and finer to slow down the shot. This process is referred to as dialing in your shot, which can also entail pre-infusion, pressure, temperature and other variables. However, to start off, just use the default settings and focusing on the grams in, grams out in how many seconds. If you’re buying specialty coffee, sometimes your roaster may be able to help you dial in your shot. 

As all grinders have some degree of coffee retention so it is recommended that you purge the coffee stuck in your grinder when adjust your grind size. In my test of a completely empty Pro model, the grinder retained 3.6 grams of coffee, which is pretty high. If you don’t purge you will end up with a shot pulled from a mix of two different grind sizes.

The portafilter and basket is what you will dose your coffee grounds into, the preparation of the puck and tamping is an important step. You can get really advanced with puck rakes, distribution tools and fancy tamps. An improperly prepared coffee puck can lead to channeling where the water finds the path of least resistance and forms a channel in your coffee which can lead to unpleasant flavors. The easiest way to diagnose this is to use a bottomless portafilter

If you plan on drinking the espresso straight, dialing in the shot correctly is very important, however if you mainly plan on making milk based drinks some of the smaller changes may not be noticeable as you are diluting your espresso with milk. 

Steps to making Espresso with Breville Espresso Machines:

  1. Pull a blank/empty shot into your portafilter, just run a single shot through to warm up your portafilter and basket. Use a clean rag to wipe clean/dry. Your machine will come with regular and pressurized baskets, for best results use the regular/non-pressurized double basket as pressurized baskets are better for pre-ground or unevenly ground coffee.
  2. The built-in grinder offers time based grinding, however I prefer to single-dose my coffee by starting with an empty hopper and adding 18 grams of pre-weighed coffee in for grinding. You may need to account for grinder retention so check the weight of the coffee coming out as well. I keep a small whiteboard by my machine that shows the empty portafilter weight and the weight + 18 grams. Remember to purge a few grams of coffee if changing grind size or different coffee.
  3. Give your coffee grounds a small spray of water from a spray bottle to help control static.
  4. Grind your coffee into your portafilter and prepare your puck. Tamp your grounds evenly and consistently. I’ve listed some tools below that can help with this.
  5. Place a scale and cup under the portafilter and select the custom shot option for your machine, the manual for the pro is linked here. Tare the scale and pull the shot until you get 36 grams of liquid out. You want this to happen in about 30 seconds, the Pro has a shot timer built in, if you are using the Express you will need to use a scale with a timer or time it yourself. 
  6. Adjust grind setting as needed to modulate taste, like I said, a good starting point is to aim for 30 seconds. There are many options with coffee recipes with different ratios and variables, but this is just our starting point for new home baristas. Try to only change one variable at a time. 
  7. Once your shot in pulled, stir, not swirl, with a spoon and taste. As you begin to refine and dial in your shots you can explore different shot ratios. Ristretto and Lungo shots are different ratios and you can also explore different temperatures and dose sizes. This process will get easier with practice. 
  8. Once you have dialed in you coffee and programmed your shot volume, you can press the shot button and let it run for future shots. However, you need to make sure you have consistent puck preparation for best results. You will need to dial in your espresso every time you get a new bag of coffee, sometimes even with the same type and brand of coffee. 
  9. If you are making a milk based drink, there are lots of videos online that will show you how to steam milk, I’ll link some below that I found helpful. This just takes practice, but I also found that having a thermometer helps with this process. Make sure to clean and purge your steam wand after every use. 
  10. Knock out your used coffee puck and do a quick purge of your machine with a blank shot without the portafilter and basket and wipe your portafilter clean. 
  11. Follow instructions on how to clean and maintain your machine. It’s best to use soft water to prevent scaling. I use Cafiza for weekly back flushing and a Dezcal for descaling. Grindz is a good product for cleaning the grinder since this one is a little harder to get in and clean than standalone grinders. 

Conclusion:

If you’re looking for an all in one package with a small form factor to get into home espresso it will be hard to find anything better than these options from Breville. I personally think the Breville Barista Pro is the best option since I like steaming my own milk and like the LCD interface. 

I really wish the built in grinder was better, the retention is really high and it’s quite difficult to clean. I’ve ended up purchasing a 1Zpresso J-Max hand grinder to really refine my coffee grind size for espresso (this is an excellent grinder if you’re willing to put in the work of hand grinding). There a lot of options for standalone grinders, but if that’s your plan you should look at buying a dedicated espresso machine without a grinder like the Breville Dual Boiler and pair it with an Eureka Specialita or similar stepless espresso focused grinder. As the name suggests the Dual Boiler has two boilers and allows you to steam and make espresso simultaneously. These other products don’t allow you to do that, you have to pull you shot first then steam your milk. The Dual Boiler also has the advantage of using a 58mm portafilter, which is the industry standard size, whereas the Express, Pro and Touch use a smaller 54mm portafilter. 

Overall, I’m happy with the purchase and would recommend the Breville Barista Pro to people wanting to make home espresso, especially if they will primarily make milk based drinks. For the difference in price I believe the Pro is worth it over the Breville Barista Express. The Breville Barista Touch is harder to justify its price increase unless you want automatic milk steaming and the touch screen interface. 

One of the disadvantages to a Breville machine is that replacement parts are hard to find outside of the warranty period. If you look up parts for the Rancilio or Gaggia you can find pretty much every single part and keep the machine going for decades. A Breville machine will eventually need to be thrown out once support ends and you cannot locate parts anymore. I talk a little about super-automatic espresso machines here, but the coffee/espresso they produce tends to be lower quality than using a semi-automatic primarily due to grinder limitations on those machines.

Milk Steaming Videos:

Puck Preparation Accessories:
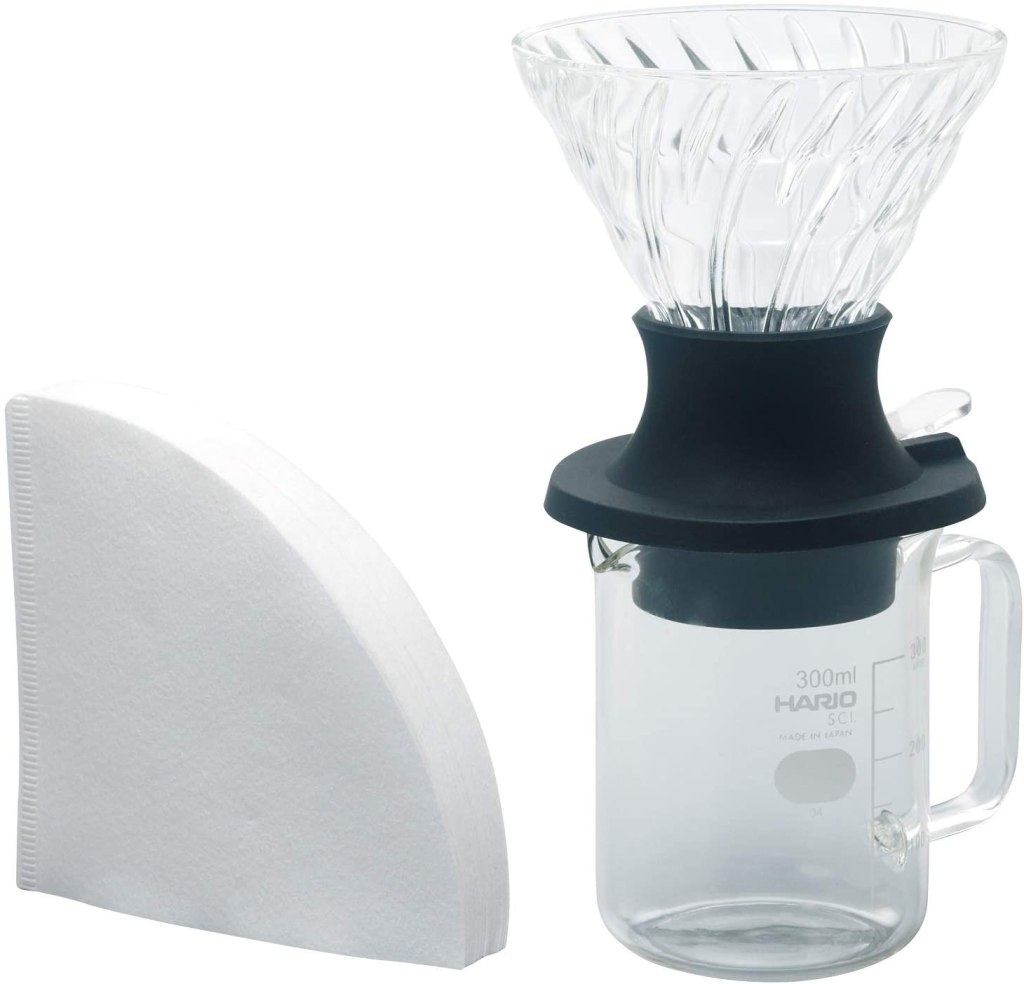
Other Accessories:

Manual for the Breville Barista Pro or Sage BES878 in the U.K.

Fellow Ode Brew Grinder Review

Fellow is known for making great looking and functional coffee products, their Stagg kettle is extremely popular. The Fellow Ode was a highly anticipated grinder because it offers large 64mm flat burrs, when most home appliance coffee grinders use conical burrs typically around 40mm in size. Flat burrs are usually found on larger prosumer and commercial grinders and are generally thought to offer a more consistent grind. Also the Ode is designed for single dosing, of which I am a huge fan. Single dosing means you measure your coffee by weight before each brew, so the Ode doesn’t have a traditional bean hopper that can store a lot of coffee, but has a small one that can only hold about 80 grams of coffee since you aren’t storing coffee in there. 

November 2022 Update: You can now purchase the Fellow Ode Gen 2 and Fellow Ode Gen 2 with SSP Burrs directly from Fellow. Along with the new and improved burr for finer grinding, it also has a larger capacity hopper and less static.

Let’s see how the Ode compares to the last two grinders (click here for full review) that we tested. I ran this test using 30 grams of light roasted coffee:

Fellow Ode:

  • Grind Time: 8.87 seconds
  • Grind Retention: .5 grams
  • Decibels: 79

Baratza Encore:

  • Grind Time: 19.49 seconds
  • Grind Retention: .5 grams
  • Decibels: 80

Oxo Conical Burr:

  • Grind Time: 9.16 seconds
  • Grind Retention: 1.6 grams
  • Decibels: 84

The Ode feels very solid and sturdy, it has a lower profile design than the other two. It also offers an automatic shut off feature that detects when there is no more coffee in the grinder. I think my unit may have been defective in that the power button kept getting stuck and the unit also made a quiet buzzing noise with vibration even when it wasn’t in operation, this appears to be a known issue with Fellow, one which there is no fix at this time. The position seems to be, don’t worry about it.. It isn’t the way it was designed, but it won’t waste power and won’t affect performance. Not sure I am really ok with accepting that as an answer. This is the first version of this grinder so I hope they address some of these issues in future releases, they plan to release a new grounds last this year that will be compatible with this version. Update: These issues were addressed in units manufactured starting in Q1 2021. You can check the Quarter and Year of manufacture on the bottom of the machine.

The Ode generates a fair amount of static, of the three grinders it had the most static. This could be addressed by using the Ross Droplet Technique (RDT), where you wet the handle end of a spoon and stir the beans before grinding or using a small spray bottle and lightly mist the beans before grinding. Don’t overdo it though and use too much water, you don’t want to drench the beans and get your grinder burrs wet. 

The Ode has a very premium look and feel, but also comes in at a premium price point. The results of the Ode are great as well, in blind taste tests it produced great coffee like the Oxo or Encore, but the Ode produced just a little bit more clarity from the cup. However, for me, I could only detect this in blind testing, when I was switching between the different grinders between brews the resulting cups all tasted similar with no one standing out as better or worse.

You can totally geek out on coffee grinders and spend a lot of money. Due to the pretty common size of the flat burr grinder you can upgrade the burrs for better performance. Fellow sells the upgraded SSP burrs as well as the Gen 2 brew burrs on their website which will give you better results. This will allow you to grind a lot finer as well. I did find the range of grind size on the Ode to fall firmly within the brew grind range, which is exactly as it is advertised, so this isn’t a negative, but just know that the range of the grind size on the other two machines is much wider, however none of these grinders will provide good results for use with espresso.

Compared to the other grinders, the Ode will require tools if you need to clean it or calibrate it. Just a phillips screwdriver for most things, but cleaning does require a little more legwork than with the Oxo or Encore. This isn’t uncommon for flat burr grinders though, and there is the option to use grinder tablets to clean as well, but you won’t get it as clean as you would with disassembly.

If you like the design of the Fellow Ode and only plan to use it for brew grinding, I would definitely consider this as your home brewer. I really like the form factor, function and how small the unit is compared to traditional burr grinders with larger hoppers. I think with the following and support of this grinder, there will be more cool options and upgrades coming down the pipeline. While there have been some issues with these grinders, like the issues I had on the unit, they are known for having great customer support and should help you with resolving any issues you have.

You can access the manual for the Ode here.

Baratza Encore vs. Oxo Conical Burr Grinder – Review & Comparison

When I was shopping for an entry level burr grinder, the most recommended one was the Baratza Encore. Over and over again this grinder was recommended for people starting off with brewed coffee. The Oxo Conical Burr Grinder was not as popular of a choice, but had some solid reviews and recommendations. For me, it came down to these two and I ended up getting the Oxo. You should really avoid starting off with a blade grinder as they chop the coffee beans into uneven bits like a food processor, where a burr grinder will provide much better results as the beans pass between two burrs at a set distance apart which offer much better evenness and taste profile.

I got my hands on a Baratza Encore and wanted to test the two side by side and see how they performed. Here are the results from some basic tests between the two. I ran this test using 30 grams of light roasted coffee:

Baratza Encore:

  • Grind Time: 19.49 seconds
  • Grind Retention: .5 grams
  • Decibels: 80

Oxo Conical Burr Grinder:

  • Grind Time: 9.16 seconds
  • Grind Retention: 1.6 grams
  • Decibels: 84

In summary, the Oxo was a lot faster with grinding but retained more coffee. The decibel levels were pretty close, but the Oxo is and definitely sounds louder than. The Encore seemed to make a lower churn noise versus a higher pitched whirring noise from the Oxo which never bothered me in the mornings until I heard the Encore. Grind retention is an issue with my Oxo, I usually have to shake the machine around and give it a smack or two then hit the grind button again for a couple seconds and this can get the grind retention down to about .4 grams. Grind retention on the Encore is great, though it tends to popcorn with single dosing. Popcorning is when some coffee beans aren’t entering the burrs and pop around before going through the burrs. Grind retention was tested by giving a grinder a thorough cleaning with a brush and compressed air then seeing the difference between the starting and ending weight. Retention between grinds will be less than starting off with a clean grinder. To address stale grounds left in your grinder between brews you can use a few grams of coffee to purge the grinder of old grounds and discard. Low grind retention is a feature on much more expensive grinders, but the Encore performs very well for an entry level grinder.

I single dose my coffee, meaning every time I make coffee I measure the beans by weight and only put those in the hopper and grind until empty, for this reason I don’t care as much about the grinder operation. The Oxo has a timer function for grinder and the button turns the grinder on and off, I usually just leave it at the max time and use the button to operate it. The Encore only has a pulse button and on/off switch, so you can either press and hold the pulse button or just turn it on and off as needed. I recommend you single dose unless your grinder has a built in scale, single dosing keeps your beans fresher as they aren’t sitting in the hopper which is not air tight and also often not UV tinted.

There is the option to upgrade the Encore to the M2 burr from the higher priced Baratza Virtuoso+ that will double the grind speed on the Encore. They are compatible and easy to change out.

It is really important for any grinder, but especially so with the Encore, to dial in your grind size. If you were to do a search of what grind setting to use for pour over on the Encore, most results say around 14, but every grinder is different, even between the exact same models, I found my ideal pour over grind setting on this Encore to be closer to 10. It was around to a 6-7 on the Oxo, which was closer to what the search results said. I use these just as a starting point and refine as I go. Keeping grinding finer until you start to taste bitterness and then adjust back coarser to hit that sweet spot for grind and extraction.

I don’t have a sieve to test the grind size distribution, however, I went off something more important which is flavor. The flavor profile between the two was too close to tell the difference for me, I did notice a little more clumping and static from the Encore though. There are a couple of tricks you can try to reduce static, you can wet the handle of a spoon and give the beans a quick stir before grinding or take a small spray bottle and lightly spray the grounds with some water before grinding. The Oxo is a pretty clean grinder where chaff and grounds stay mostly within the grounds bin. 

One thing that makes the Baratza very attractive is the availability of parts and post purchase support. Oxo also has great support however you cannot buy replacement parts as easily, you will need to go through their customer support for your issues. For Bartaza you can go online and buy any replacement or upgrade part easily as Baratza doesn’t want you to throw any machine away, but rather wants to see you repair/maintain it for longevity. Also due to the popularity there is a lot of information and support you can find online. 

Neither of these grinders will be ideal for making espresso and performs best when used for brewed/filter coffee. Learn more about brew methods here

To me, there is no clear winner between these two grinders as they are both great choices. The Baratza definitely feels more solid and sturdy, it comes in at a higher price point and grinds slower, but that is something you could address through a burr upgrade.

The Oxo comes in at a lower price point, grinds faster but is louder with more retention. Oxo has great post purchase support as well, but replacement parts are harder to come by with no available upgrades. I recommend the Oxo as a great entry level grinder if you are on a budget, I also took a look at the Cuisinart DMB-8 Grinder for a value grinder, but it felt so cheap and I didn’t like the operation so I really can’t recommend going any lower than the Oxo Conical Burr Grinder. The Baratza Encore is also a great value with a slightly higher price point and you know you can buy it for life.

For a more premium grinder with flat burrs, check out our review of the Fellow Ode. The Ode can really bring you right up into the prosumer range of coffee makers for brewed coffee only, not for espresso.

Oxo Conical Burr Grinder Manual

Baratza Encore Manual